I’m actually not here right now, I’m having my annual mother and daughter long weekend away with Miss Frugal and hopefully, I’m having a great time. We’ve done something similar for the last couple of years and the men (well one man, one boy) of the house are more than happy to stay home without us and talk football and gaming without us rolling our eyes and changing the subject to something we actually understand. 😉
I will miss them though and as I always do, I’ll Facetime every day and stay in touch as often as possible by text message but this year I’ve done something extra as well as that – I’ve written them some little letters and made them into folded paper envelopes. The letters are just a quick note from me to tell them that I love them and a couple of them have little clues to where they can find a treat from me which I hid the morning before I left.
I folded the envelopes myself from some pretty paper that I got from the Trimcraft Bloggers Day in February and they look so cute that I wanted to share them on here for you in case you want to try making them yourself too.
How to make a DIY Folded Paper Envelope
It took me a couple of attempts to line the folds up in the right place so I’d definitely have a few practice runs with some plain, cheap paper before you start with the paper you want to use if you’re using posh paper like I did. 😉
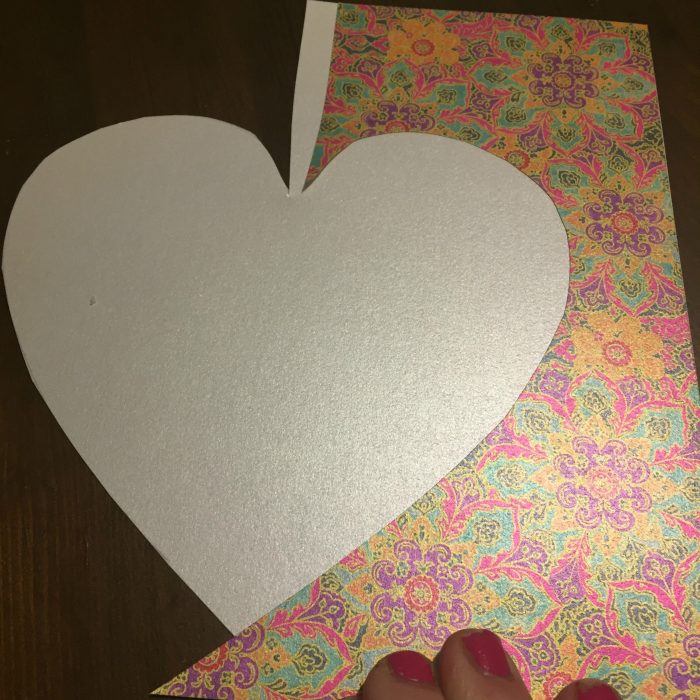
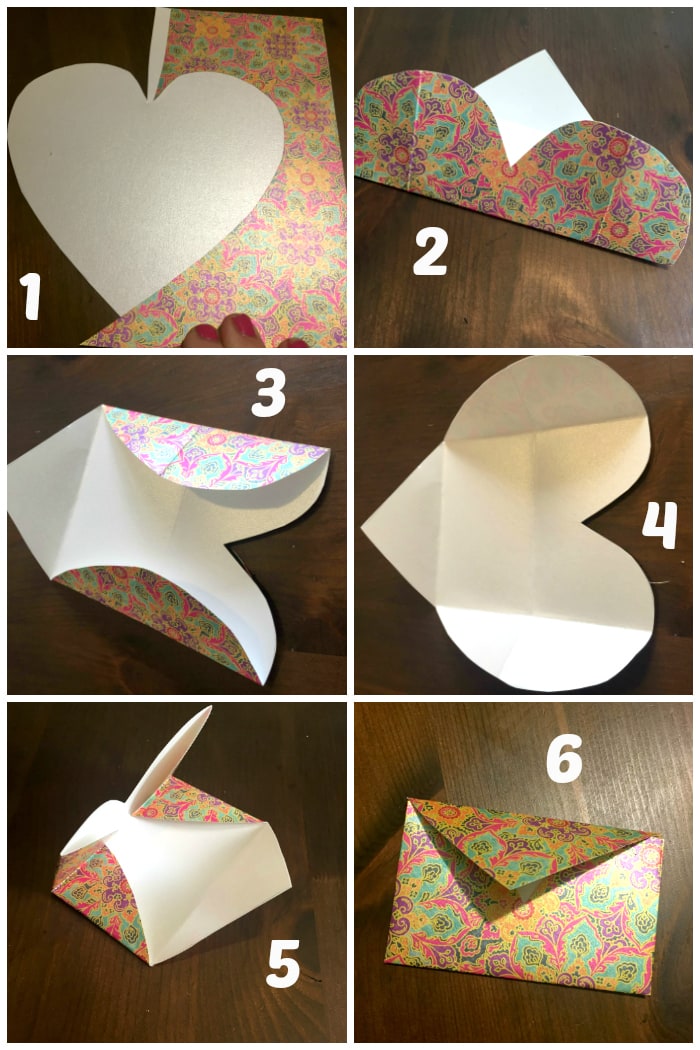
First of all you need to cut a heart out of a piece of pretty paper or card. I always find it dificult to draw a symettrical heart and I don’t have anything to use as a template that’s the right size so I draw one half and cut it out as neat as I can and I then turn the off cut or card over and use that as my template for the other side! You could of course just fold your heart in half but the fold lines, however light they are, would take away from the finished look of the envelope.
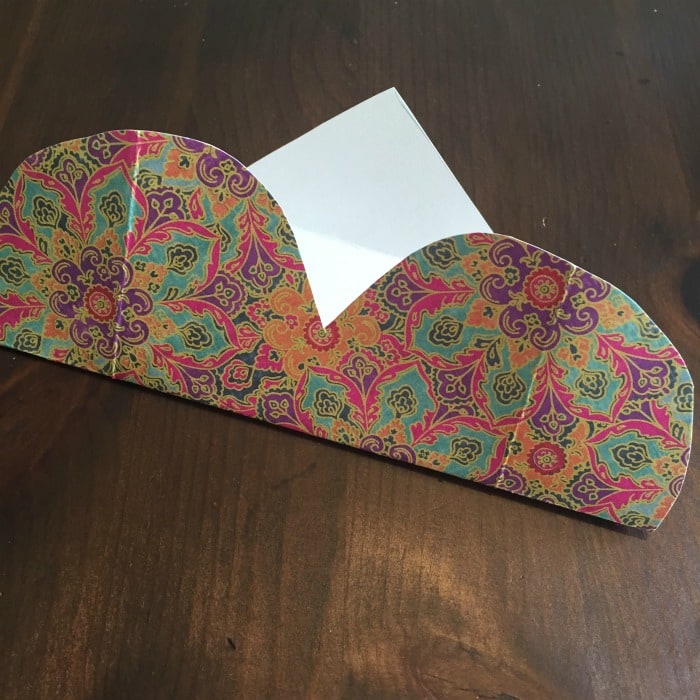
When you have your heart cut out, old the top part downwards. While you’re there fold the bottom part upwards – the pointy bottom part should overlap the fold you made using the bottom part.
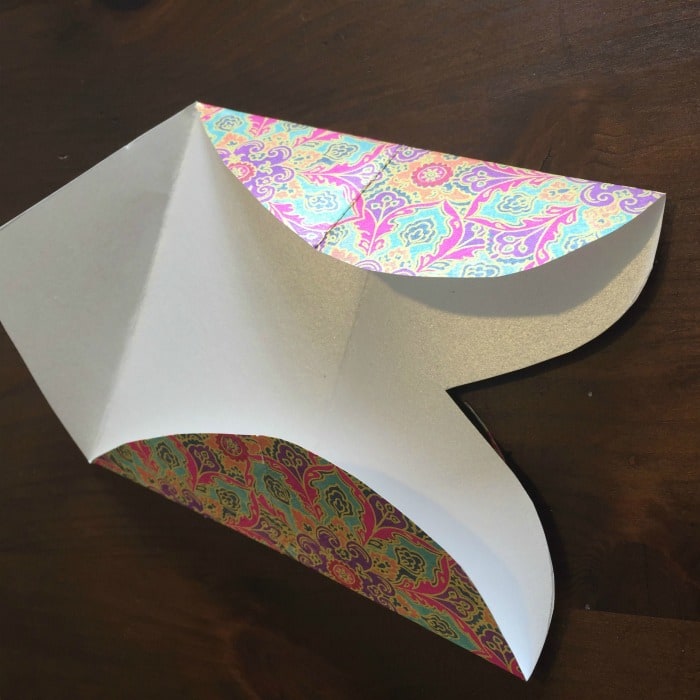
Now, unfold the folds you’ve made at the top and bottom or a minute and fold the sides inwards – the straighter you can get them the neater your finished envelope is going to look.
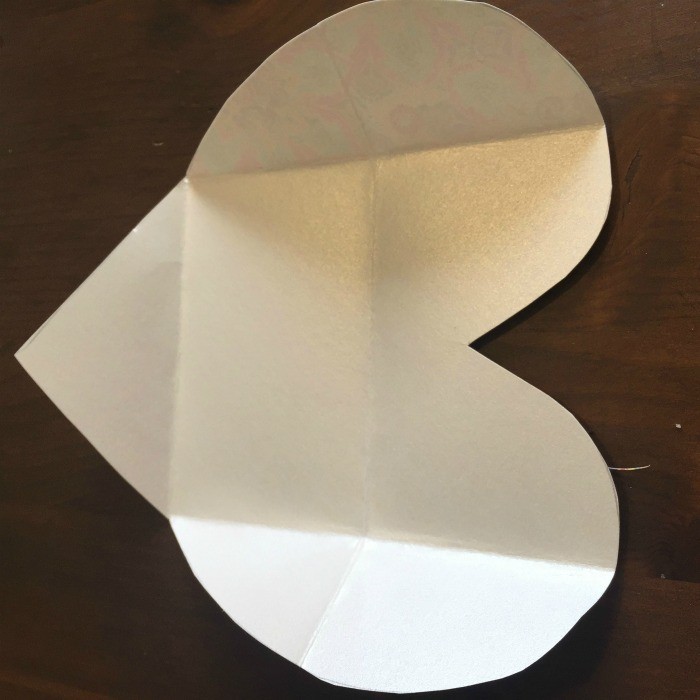
If you now flatten out your heart then you should see the folds looking similar to this. Do you see why I said you might like to attempt this with plain paper first? 😉
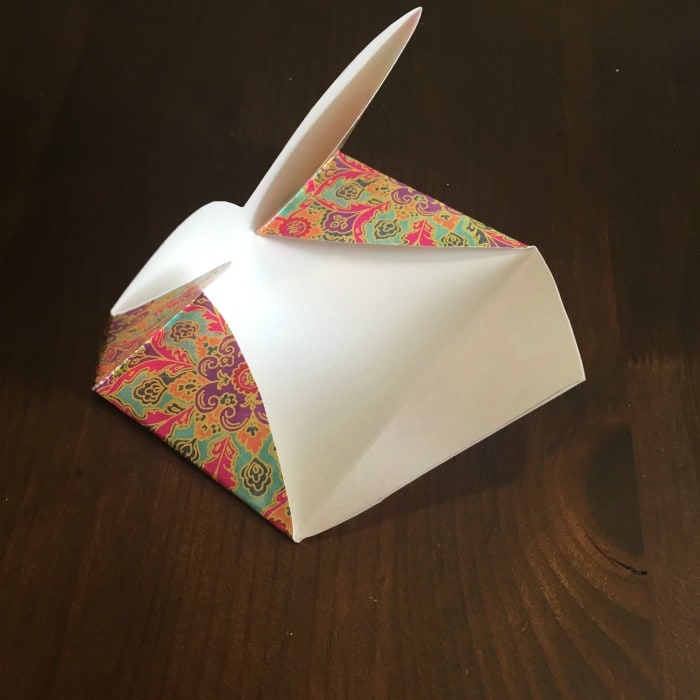
You’re almost done! Now fold the sides inward again and fold the bottom upwards, using the fold lines you already made.

You now have your cute little DIY folded paper envelope!
You can either write on the paper directly and then fold it up as above or you can pop a small message inside.
I use a little piece of sellotape to keep it closed but you could use a little sticker or even cut a slit in the envelope and tuck the pointy part in.
Don’t miss out on future posts like this – receive updates directly to your inbox by email by adding your email address here and hitting subscribe. You can also follow me on Twitter, BlogLovin or Networked Blogs and I’d love to see you over on my Facebook page and on Instagram.
Discover more from The Diary of a Frugal Family
Subscribe to get the latest posts sent to your email.

