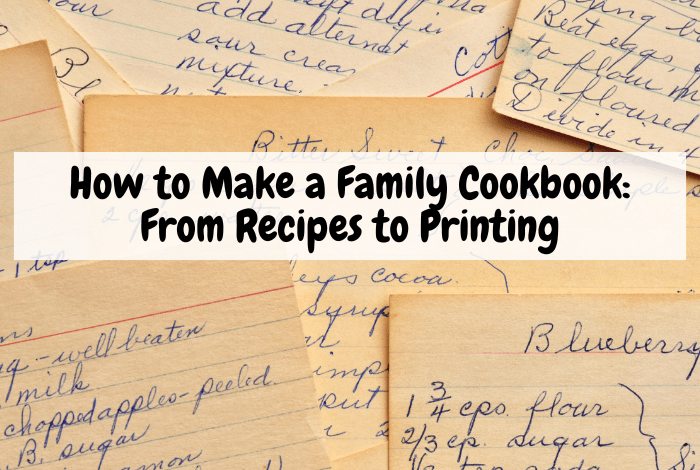
This comprehensive guide will walk you through each step of making your family cookbook.
Step 1: Gathering Family Recipes
Start by contacting your relatives and asking them to share their cherished recipes. This can be an excellent way to connect with family members and involve them in the project. Here are some tips on how to effectively gather these recipes:
When reaching out to family members for recipes, make your request personal by explaining the purpose of the family cookbook and how much their contribution would mean to you. Share your excitement and the sentimental value behind the project to convey its significance. Be flexible and considerate to ensure everyone feels comfortable participating. Provide clear instructions to make it easy for your relatives to share their recipes. Ask them to include specific details like measurements, cooking steps, and any personal notes or stories associated with the recipe.
Recording Traditions:
Some of the best recipes are not written down but passed down by older relatives. Capturing these stories can be a precious part of your family cookbook.
When interviewing older relatives, take the time to sit down with them and ask about their favourite recipes. Prepare a list of questions to guide the conversation, focusing on ingredients, steps, and any special memories associated with the dish. Use a voice recorder or video camera to capture these conversations, which will help you accurately document the recipes and preserve the voices and expressions of your loved ones, adding another layer of sentimental value to your cookbook.
Step 2: Organising the Recipes
Categorising Recipes:
Once you have gathered all the recipes, the next step is to organise them into categories. This makes the cookbook easier to navigate and more visually appealing.
Divide the recipes into main categories such as appetisers, main courses, desserts, and beverages to help readers quickly find the type of recipe they are looking for. Within each main category, create subcategories for specific types of dishes. For example, under main courses, you could have subcategories like poultry, beef, vegetarian, and seafood. This further refines the organisation and makes the cookbook more user-friendly.
Consistency is key to making a professional-looking cookbook and standardising the format of your recipes ensures they are easy to read and follow. Decide on a consistent format for all recipes, including the recipe title, list of ingredients with measurements, step-by-step instructions, and cooking time. Consider making a template to use for each recipe.
Additionally, convert all measurements to a standard system (cups, tablespoons, grams) to maintain consistency throughout the cookbook. This is especially important if you have recipes from different regions with varying measurement systems.
Personal touches can make your family cookbook genuinely unique and meaningful. Ask family members to include anecdotes or stories related to each recipe. This could be about the recipe’s origin, a memorable family event where it was served, or why it’s a favourite. Additionally, encourage contributors to share any tips or variations for the recipes. These insights can be invaluable for readers trying the recipes for the first time and add depth to the cookbook.
Step 3: Designing Your Cookbook
Choosing a Layout:
A well-designed layout makes it easy for readers to follow the recipes and enhances their overall experience. Choose a layout that is visually appealing and easy to navigate, deciding on the placement of text, images, and other elements. Utilise templates in design software such as Adobe InDesign, Canva, or Microsoft Publisher. These tools offer pre-designed templates that you can customise to fit your needs. If you prefer a more personalised approach, you can create your layout from scratch.
Choosing a Size:
The size of your cookbook is another important consideration that affects its usability and visual appeal. Choosing the right size ensures that your cookbook is easy to handle and the content is well-presented. Standard cookbook sizes include A4 (210 x 297 mm), which provides ample space for detailed recipes and large photos; A5 (148 x 210 mm), which is more compact and portable; and square formats like 210 x 210 mm, which offer a modern and visually striking layout. Consider your audience and the amount of content you plan to include when selecting the size. A larger format might be ideal for a comprehensive family cookbook with extensive notes and large images. At the same time, a smaller size could be perfect for a concise collection of favourite recipes.
Incorporating Photos:
Photos are a vital part of any cookbook, visually representing the recipes and making the book more engaging. To capture high-quality photos of the dishes, invest time in setting up good lighting and a clean background to make the food look as appetising as possible. Experiment with different angles to find the most flattering shots, and consider using natural light to enhance the appearance of the dishes. Additionally, incorporate family photos to add a personal touch. This could include pictures of family gatherings, cooking sessions, or historical photos related to the recipes.
Here are some tips to get the best possible pictures of food:
Use Natural Light: Whenever possible, use natural light from a window. Avoid harsh, direct sunlight, which can create unappealing shadows.
Keep Backgrounds Simple: Use neutral, uncluttered backgrounds to keep the focus on the food.
Experiment with Angles: Try different angles, such as overhead shots or close-ups, to find the most flattering perspective for each dish.
Use Props Sparingly: Incorporate simple props like utensils, napkins, or ingredients, but avoid overcrowding the shot.
Edit Thoughtfully: Use photo editing software to enhance colours, adjust brightness, and correct imperfections without overdoing it.
Equipment Recommendations:
The right equipment can make a big difference in the quality of your food photos. For beginners, a smartphone with a good camera can suffice, as many modern smartphones have excellent cameras with features specifically designed for food photography. For those wanting to invest in more advanced equipment, a DSLR or mirrorless camera with a macro lens can provide superior image quality and greater control over the final image
Tips on Using Smartphones for High-Quality Food Photography:
If you’re using a smartphone, use the grid feature to align your shots and avoid zooming in, which can reduce image quality. Apps like ProCamera or Lightroom Mobile offer advanced settings that can help you achieve better results. These apps allow for more precise control over exposure, focus, and white balance, enhancing the overall quality of your food photos.
Cover Design:
The cover of your cookbook is the first thing people will see, so it should be inviting and reflective of the cookbook’s theme and spirit. Designing a cover that captures the essence of your family cookbook is crucial. Consider incorporating elements such as a family photo, an illustration of a beloved dish, or a design that reflects your family’s cultural heritage. These personal touches can make the cover more meaningful and engaging.
You might want to consider hiring a graphic designer for a polished and professional look. An experienced designer can bring your vision to life and ensure the cover is visually appealing and stands out. They can help with layout, typography, and selecting the right colours and images to make your cover attractive and cohesive with the rest of the book.
Whether you opt for a DIY approach or professional assistance, a well-designed cover will draw readers in and give them a glimpse of cherished recipes and memories.
Step 4: Formatting and Editing Your Cookbook
Formatting Tools:
Creating a cookbook requires the right formatting tools to ensure consistency and readability. Here are some recommendations for user-friendly formatting software that cater to different levels of expertise:
Canva: Canva is a versatile and easy-to-use platform that offers a variety of templates specifically for cookbooks. Its drag-and-drop interface makes it ideal for beginners who may have a limited amount of design experience. Canva allows you to customise templates with your text, photos, and illustrations. You can adjust fonts, colours, and layouts to create a cohesive and visually appealing design. It also offers a range of export options, including high-resolution PDFs for printing.
Adobe InDesign: Adobe InDesign is a more advanced tool that provides extensive control over layout and design. It’s perfect for those looking for a highly polished and professional finish. InDesign offers powerful features for precise typography, page layout, and graphic design. It supports complex layouts, including multi-column text, embedded images, and interactive elements for digital cookbooks. While there is a learning curve, numerous tutorials and resources are available to help beginners get started.
Microsoft Word: Microsoft Word is a widely accessible and user-friendly tool that can be effectively used to format your family cookbook. It offers a range of functionalities that are sufficient for making a cookbook, including templates for easy layout design. Word allows you to insert and format text, images, and tables, and provides tools for creating a table of contents and index. While it may not have all the advanced features of specialised design software, it is an excellent choice for beginners due to its familiarity and ease of use. You can export your finished cookbook as a high-resolution PDF for printing.
Additional Formatting Tips:
Consistency: Consistency in formatting is critical to creating a professional-looking cookbook. Use the same font styles, sizes, and colours throughout the book. Ensure that margins, spacing, and alignment are uniform on every page.
Templates: Use templates to maintain consistency across different sections of the cookbook. Templates can standardise the layout for recipe pages, chapter headers, and other recurring elements.
Visual Hierarchy: Establish a clear visual hierarchy to guide readers through the content. Use headings, subheadings, and body text styles to differentiate between different types of information. Highlight critical elements such as recipe titles, ingredients, and steps with distinct styles or colours.
White Space: Don’t be afraid to use white space strategically. Adequate spacing between elements improves readability and gives the design a clean, uncluttered look.
Step 5: Printing the Cookbook
Selecting a Printing Service:
Choosing the right book printing service is essential to ensure that your cookbook looks professional and is durable. A high-quality book can significantly impact the final product, reflecting the time and effort you put into making your cookbook.
Researching Various Book Printing Services:
Begin by looking into several printing services to compare their offerings. Consider factors like the types of binding they offer, such as spiral, hardcover, or perfect binding. Evaluate the paper quality, print resolution, and additional services such as design assistance. Some book printing companies may provide templates or design support to help you perfect your layout, which can be particularly helpful if you’re new to creating books.
Comparing Costs, Print Quality, and Customer Reviews:
When comparing costs, obtain quotes from multiple printing services to ensure you get the best price for your project. Consider additional costs like shipping, design services, or proof copies.
Print quality is another critical factor—request samples from different printers to evaluate the quality of their work. Pay attention to colour accuracy, paper weight, and binding durability. High-quality printing will ensure that your photos look vibrant and that the text is crisp and easy to read.
Customer reviews and testimonials are invaluable when selecting a printing service. Reading reviews from other customers can provide insights into the reliability and quality of the service. Look for feedback on print quality, customer service, and delivery times to make an informed decision.
When selecting a book printing service for your cookbook, it’s essential to consider the pros and cons of different options to find the best fit for your needs and budget. Here’s a comparison of some popular book printing services:
Amazon Kindle Direct Publishing (KDP) is a popular choice for those looking to print books affordably. KDP offers a cost-effective solution, making it ideal for those on a tight budget. However, setting up your book for print on KDP can be somewhat complex, particularly for beginners. Additionally, the print quality, especially for colour photos and high-quality finishes, may not be as high as other services.
ImprintDigital is a high-quality book printer based in the UK, known for producing superior quality hardback books. If you’re looking for a professional finish and durable binding, ImprintDigital offers excellent services. While it can be more expensive than KDP, the investment is worth it for those prioritising quality. ImprintDigital provides better print resolution and materials, ensuring your cookbook looks polished and lasts longer.
Blurb is known for its high-quality printing and the ability to order single copies, making it a flexible choice for personal projects like family cookbooks. Blurb offers good print quality and professional-looking results. However, it can be more expensive, and while Blurb provides a range of templates and design tools, custom options may be limited compared to other specialised book printers.
Your Local Print Shop:
Many towns and cities have local print shops that offer book printing services. Using a local print shop can be convenient and support local businesses. They often provide a more personalised service and can be easier to work with face-to-face. However, local print shops may need more advanced services and high-end materials from specialised book printers. They may also have limited options for binding and print quality compared to services like ImprintDigital.
By comparing these options, you can make an informed decision on which printing service best suits your needs for producing a high-quality family cookbook. Each service has its strengths and considerations, so choose the one that aligns best with your priorities for quality, cost, and customisation.
Making a family cookbook is a heartfelt and rewarding endeavour that preserves cherished recipes and memories for future generations. Whether preserving age-old recipes or creating new traditions, your family cookbook will become a treasured heirloom, celebrating the love and togetherness that comes from sharing meals and memories.
So gather your recipes, roll up your sleeves, and get started on this incredible journey of making your family cookbook.
Don’t miss out on future posts like this – receive updates directly to your inbox by email by adding your email address here and hitting subscribe. You can also follow me on Twitter or BlogLovin and I’d love to see you over on my Facebook page and on Instagram. If you’re interested, you can find out more about me here and while I’ve got your attention, if you’re wondering why some of my posts lately are a little bit less frugal then have a read of this post. 


 Logging you in...
 Loading IntenseDebate Comments...
