This post is all about how to set up canned responses in Gmail so it’s probably only useful to about 10% of people who read this blog if I’m honest but I thought I’d share it anyway as the benefits for those people who do find it useful are HUGE in terms of timesaving and effort.

As a blogger, I get a fair few emails every day which basically require very similar answers initially and at one point, just managing my email inbox was taking over most of my time online.
It was starting to become unmanageable so I looked at ways that I could streamline the process of replying to the emails that I got each day and the first thing I did was to set up canned responses in Outlook which was the email service I was using at the time.
In case you don’t know, a canned response is a template reply that you can easily insert into an email as a reply to save you having to type out the response – great for when you get lots of emails that need a similar reply.
Using these canned responses I managed to clear my inbox so much quicker each day – I basically went through my emails and deleted any spam or unimportant emails first of all, then went through and fired off a load of canned responses and got rid of those emails which left me with a much more streamlined number of emails that needed an individual reply.
Life was good in the email world again.
But I change blog hosts and Outlook was a complete nightmare to initially set up and then it would have a meltdown at least once a month which always took so long to sort and in the meantime I was left relying on the hosts email server which was from the 1990’s by the looks (and functionality) of it.
In the end, I changed hosts again because I couldn’t deal with it anymore and my new host was lovely enough to set me up on GSuite which is a Gmail Product for businesses and the first thing I did was re-set up my canned responses in Gmail. And seeing as I shared how to set up canned responses in Outlook with you, I thought I’d go the whole hog and share how to set up canned responses in Gmail too.
How to set up canned responses in Gmail.
>>Sign into your Gmail account.
>> Find the little gear icon which you’ll see in the top right corner.
>> Select Settings from the options that pop up.
>> Select Labs, which is one of the tabs across the screen.
>> Click on ‘Enable Canned Responses
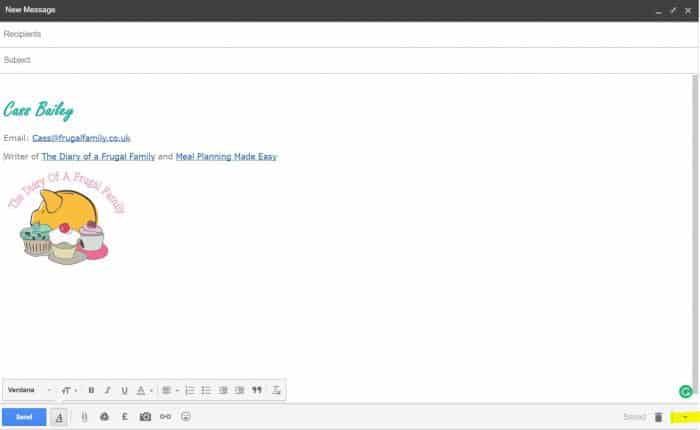
>> Once that’s saved, come out of that and select compose and type your email as you want it to be saved keeping it quite generic as it’s going to be going out to multiple people.
>> When you’re done and ready to save your template, click on the teeny little arrow in the bottom right corner:

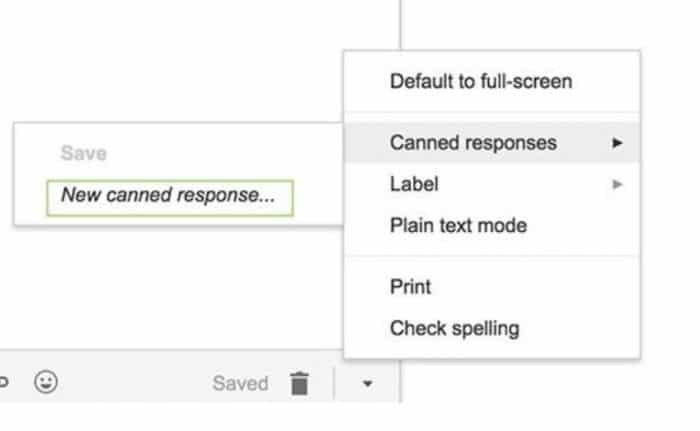
>> Now select the option for ‘Canned Response’ and then ‘New Canned Response’:

>> Type in the name you want for this particular canned response and click on OK.
Next time you need to reply to an email using that canned response you can simply click on the little arrow again, then canned responses and you’ll see your saved template in there. Just click on it and it will automatically populate into your email.
You can also add attachments to your canned responses, for example, your blog media pack but I have found that only works if you have the attachment saved in Google Docs as a PDF. If it’s stored anywhere else then you need to re-add each time which only takes a second but if we’re streamlining then you might as well do this bit too!
I have about eight canned responses set up so I’m pretty much covered for about 90% of the initial emails that I get each week.
Don’t miss out on future posts like this – receive updates directly to your inbox by email by adding your email address here and hitting subscribe. You can also follow me on Twitter, BlogLovin or Networked Blogs and I’d love to see you over on my Facebook page and on Instagram


 Logging you in...
 Loading IntenseDebate Comments...

Jen · 373 weeks ago
Riya Malhotra · 372 weeks ago
Syringe Filters · 346 weeks ago
CA Syringe Filters