I wouldn’t usually re-publish a post but every now and again, I remember about a post I wrote that’s hidden away in my archives craving a little bit of attention (aren’t we all?). This post, for example, was originally published a year or so ago but I really wanted to share it with you again today as I’ve just made a second pair of curtains using the same method.
I’ve been after a pair of thick cream curtains for my living room for a while now but I’m struggling to find a pair that I like enough to buy! It’s not that I’m fussy though, I just have very specific requirements
I want them to be cream but a warm cream colour if you know what I mean with some sort of pattern but I want the pattern to be cream too as I don’t want any other colour in them. I want them to be a heavy material with lining to keep as much heat as possible in the house and I don’t want to pay a fortune for them. That’s not fussy at all, is it?
Anyway, I searched every corner of the internet and every shop in the area that sells curtains and couldn’t find what I wanted for the price I wanted to pay so I gave up and decided to make my own.
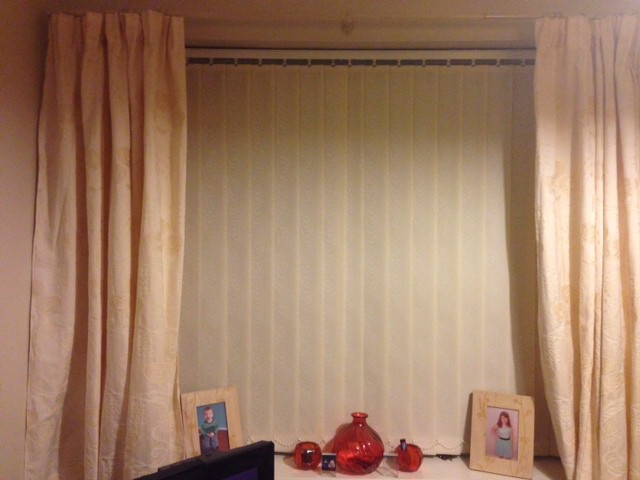
I’m really pleased with the results and if I can make them, anyone can considering the fact that I just bought the fabric on a whim when I found it because it really was exactly what I wanted and by the end of the same day my new curtains were hanging in the Living room.
They were so easy that I made a little guide in case you want to make your own although I’m sure most of you could run up a pair of curtains in your sleep! I would like to say though that this is the probably the simplest way to make curtains and I sure if you Googled it you could make a much more sophisticated pair than I’ve made!
First of all, I’m lucky that my windows are an average width so the width that fabric comes in when you buy it is perfect for what I wanted. All I had to do was measure the length of curtain I wanted from the curtain pole to where I wanted them to go to and I added an extra 10cm for hemming.
The lady in the shop even cut the fabric into two equal lengths for me to make it even easier.
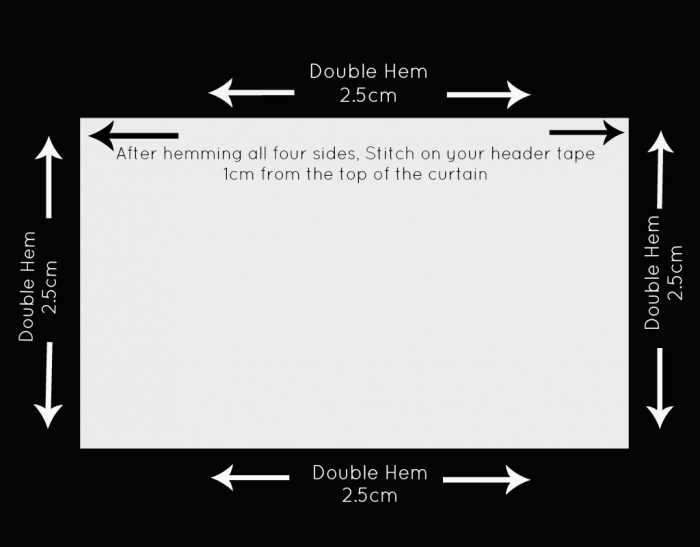
When I got home, I pinned 2.5cm double hem (ie, I turned the fabric over twice to make a 2.5cm hem) and then after giving serious consideration as to whether my old faithful Wonderweb would do the job, I decided I’d be better off getting the sewing machine out.
I sewed all four edges (and my finger) using a cream coloured thread and then I pinned on my header tape (bought from the same place as the fabric) which I positioned 1cm from the top of the curtain. In the same cream thread, I sewed that on making sure that all four edges of it were secure.
Next I gathered the header tape up making sure that the curtain was the right width and the gathers were all equal rather than it being bunched up in some places and spaced out in others before I knotted the header tape.
Then I laid it on the floor and did the same to the other piece of fabric except this time, when I was gathering the header tape, I made sure that I got this one more or less the same size as the other one by laying it on top of it.
The only thing to do after that was to attach the curtain hooks and force encourage Mr Frugal to put them up for me.


 Logging you in...
 Loading IntenseDebate Comments...

Tracy Lounis · 563 weeks ago
gordijnen · 551 weeks ago