I take a lot of photos and by a lot, I mean a LOT
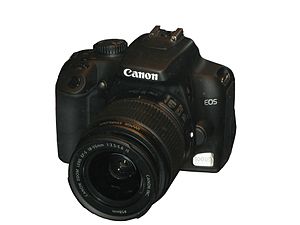
I have a DSLR camera and one of my ambitions this year was to learn to use it so I could venture out of Auto mode. I’ve haven’t really done much to achieve this though for a couple of reasons – I’ve just started a new job which meant that everything was chaos for about six weeks while I finished everything up at my old job and started my new one. Even now, I’m still settling in to my new role and working more hours than usual while I find my feet. My other excuse reason is that I have an iPhone which takes excellent photos so I rarely need to get out my DSLR out – even though if I did, the photos I took would be even better!
But I do want to learn so I’ve been having a play to try and teach myself. The only problem is that a lot of the information online is quite wordy and explains everything in such great detail along with the why you need to know and how each thing does what it does. At this stage though, I just want to know what I need to do to take good photos – the rest can come later!
Here’s a few of the things I’ve learned so far….
Aperture – This is the magic setting that can give your photos depth of field – you know the effect when the background of your photo is blurred but the subject is in perfect focus. The aperture setting controls the amount of light that the camera allows in – a large f-number such as f/32 will focus all objects in view, whereas a smaller f-number such as f/1.4 will make the foreground objects sharper and the background will be blurry.
ISO – In easy terms, the more light there is, the lower ISO setting you need. If you’re outside with lots of natural light, you’re better off using an ISO setting of 100 or 200. I usually use an ISO of around 400 indoors although my camera also has 800 and 1600 settings for near darkness shooting. Use the lowest ISO suitable for your surroundings and don’t forget to switch it back afterwards
Shutter Speed – Shutter speed is quite simply the amount of time that your shutter stays open when you click the button to take your photo. It’s measured in fractions of a second:
1/1000 1/500 1/250 1/125 1/60 1/30 1/15 1/8 1/4 1/2 1
So if you set your shutter speed as 1/1000 of a second, your shutter will remain open for much less than if it was set to 1 second. The longer the shutter remains open, the more action your camera can capture on your photo. So, you might use a setting of 1/2 to 1/30 to add some background blur to a moving action shot (like someone or something running) and a setting of 1/500 to 1/1000 to freeze a sports shot with no blur at all. Your usual settings would be 1/50 to 1/100.
By learning what the above three settings mean, you can learn to control your camera more and take much better photos.
The different settings on your camera allow you to control some or all of the above three settings:
Auto – Your camera will automatically choose the settings for you – Simple photography at it’s best!
P (Program) – Your camera automatically selects aperture & shutter speed and allows you to choose your own ISO speed.
A or AP (Aperture Priority) – Your camera automatically selects the shutter speed based on the aperture & ISO speed that you choose.
TV or S (Shutter Priority) – You can specify the shutter speed & ISO and your camera will select the corresponding aperture.
M (Manual) – You specify the aperture, ISO and shutter speed. Not so Simple photography but the results will be stunning when you master this!
I hope this helps you a little bit
Don’t miss out on future posts like this – receive updates directly to your inbox by email by adding your email address to the box on the top right of this page and hitting subscribe. You can also find me on BlogLovin, Yummly and Networked Blogs and I’d love to see you over on my Facebook page and on Instagram.
Image credit: Shutterstock, Titikul_B


 Logging you in...
 Loading IntenseDebate Comments...
