Master Frugal isn’t a fan of upheaval so for the last six months or so when I’ve been itching to get in his bedroom and give it a makeover, he’s been begging me not to!
It desperately needed doing though so as his coach pulled away on Monday morning for his three day school residential, I was practically racing back to my car to get started on gutting his bedroom with the plan achieving of a complete room transformation before he got home – on a pretty tight budget!
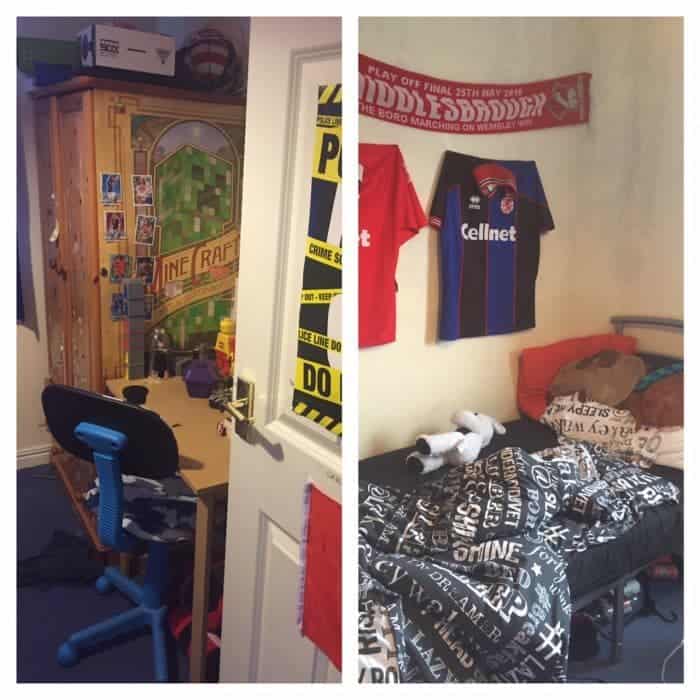
Before:
One wall looks worse than the rest as it had a huge self adhesive Avengers mural (here’s what it looked like before he got bored of superheroes about six months after it went up) which we pulled down on a whim one Sunday afternoon. It took some of the paint off with it so I hung some of my brother’s old Boro shirts up in an attempt to cover up the mess until I got chance to get in there and paint. The wardrobe has been in there since we moved and has been covered in all sorts of stickers and posters. There’s no particular order to anything in there either which is a big thing that I need to address.
These photos should give you a bit of an idea what I mean….
What we did….
The main thing was just freshening the room up by painting it and even if we’d just done that it would have made a huge difference as the white makes the walls look so much brighter and actually makes a small room look much bigger. White might seem like an odd choice for a boys bedroom but we chose it because it looks so clean and fresh and it’s really easy to wipe down any marks – what doesn’t clean is just painted over! We spent extra on paint and bought the Dulux Once in brilliant white but despite sanding and re-sanding the walls where the mural had been it still wasn’t just a once coat job. COST £19.99 for paint.
I ummed and aahed about what to do for clothes storage as he hated the big wardrobe and it seemed to take up so much space so we got rid of it completely and replaced it with some drawers which should work better for him as he always tried to stuff everything in the drawers of his wardrobe. The few things he has got that need to be hung up are now in Mr Frugal’s wardrobe who has plenty of space as he prefers drawers too! COST £39.99 for the drawers.

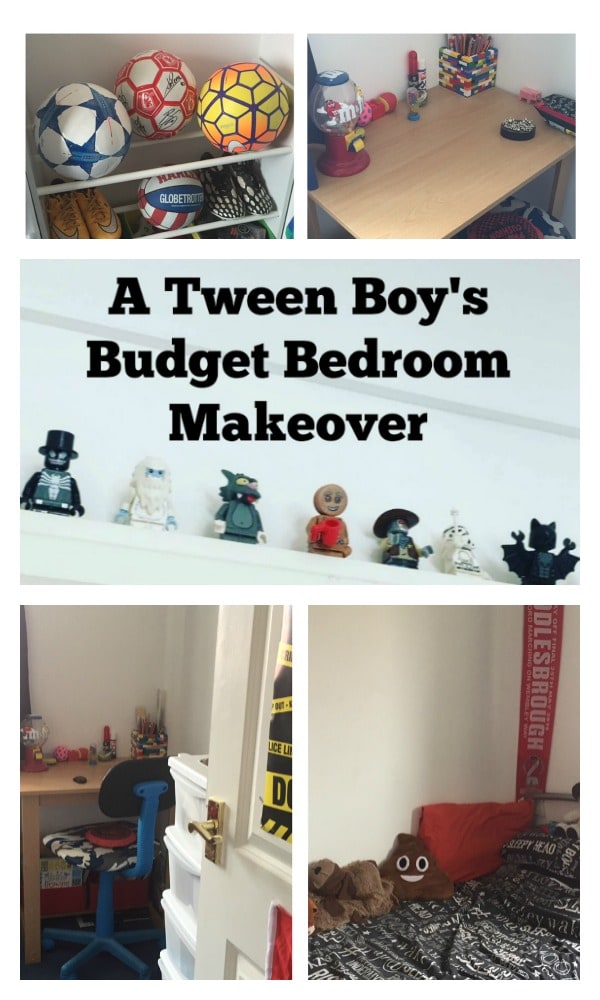
We made a mini shelf above his door frame for his favourite Lego figures because even though he doesn’t enjoy playing with Lego as much these days, he still likes his figures. I just used some plastic edging from B&Q and asked the man to cut it to size. COST £2.35 for the plastic edging.
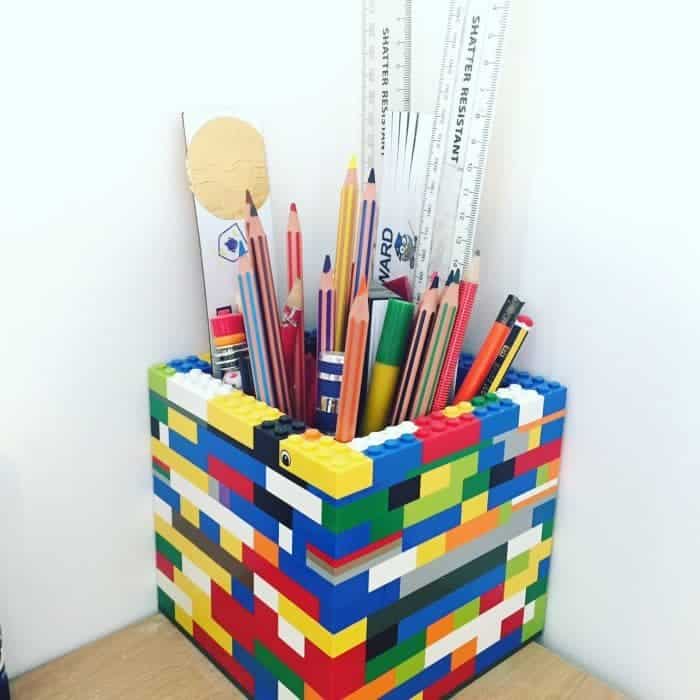
Speaking of Lego, I made a pen pot out of his old Lego which I think looks pretty cool sitting on his desk. COST: FREE
We bought some self adhesive hooks to hang on the back of his door for his dressing gown, jacket and some of his baseball caps. COST: £5
After….
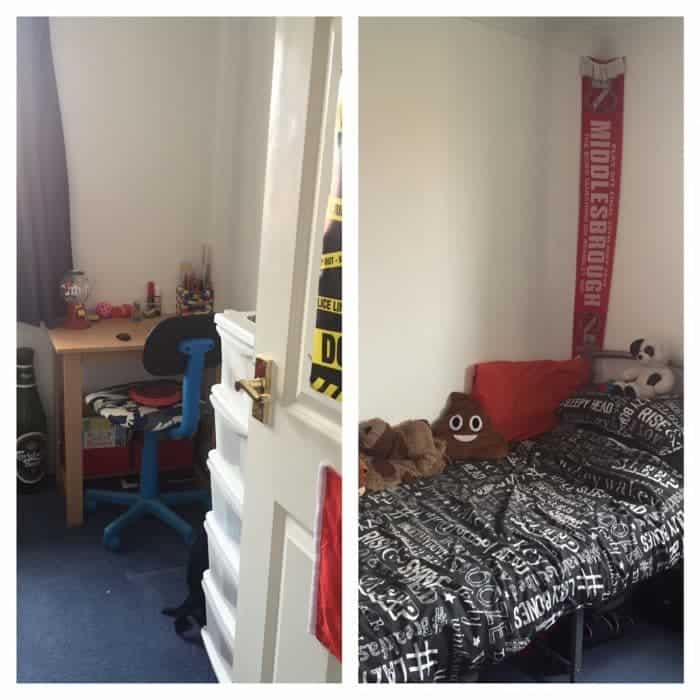
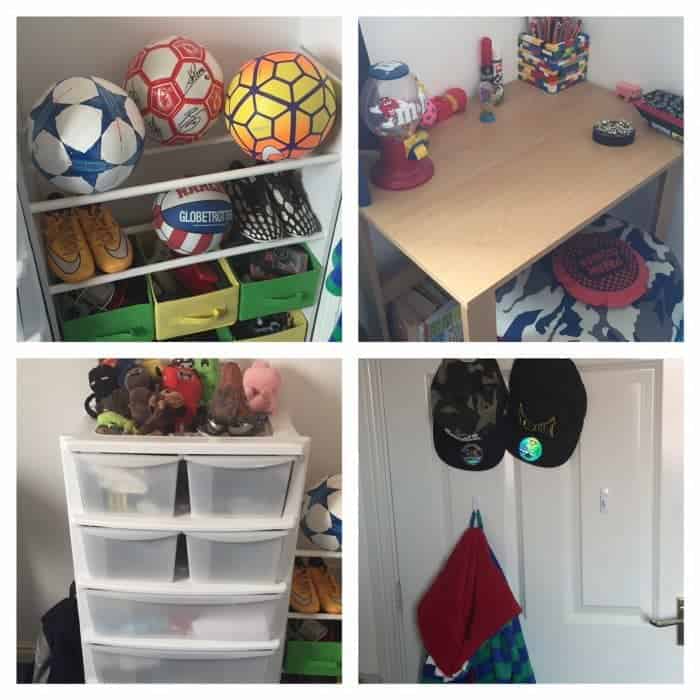
Master Frugal came back from his residential yesterday and couldn’t believe his new room – he’s absolutely over the moon with it which makes all the hard work worthwhile!
Don’t miss out on future posts like this – receive updates directly to your inbox by email by adding your email address to the box on the top right of this page and hitting subscribe. You can also find me on BlogLovin, Yummly and Networked Blogs and I’d love to see you over on my Facebook page and on Instagram.




 Logging you in...
 Loading IntenseDebate Comments...

screaminginsuberbia 70p · 460 weeks ago
Jual Partisi Kantor · 439 weeks ago
Sarah | Boo Roo and Tigger Too · 460 weeks ago
New England Flybaby · 460 weeks ago
Charlie Paint · 450 weeks ago
Jay · 447 weeks ago
castlesfurniture 2p · 443 weeks ago
Jual Lemari Arsip · 439 weeks ago
Rain · 438 weeks ago
emma · 437 weeks ago
Post Malone · 427 weeks ago
David · 402 weeks ago
Flora · 401 weeks ago