Today I’m going to share how you can upcycle a table using milk paints, something I learned at a class I went along to recently as part of my mission to create every day and spend a little more time on me!
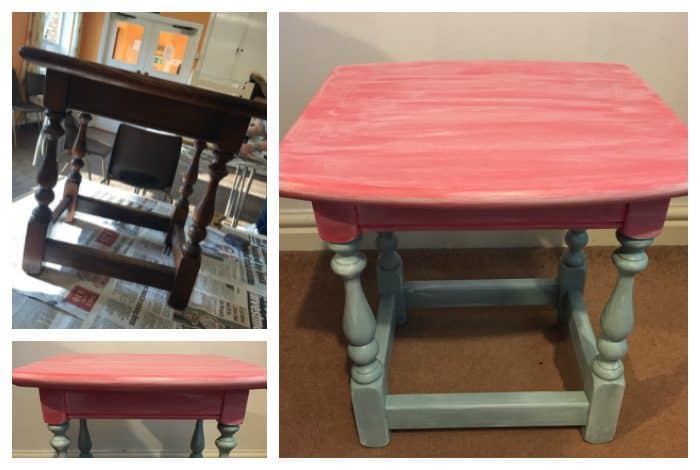
I love the idea of using milk paints, which is something I hadn’t even heard of until I went to the Festival of Thrift last month but now that I’ve tried it, I’ll definitely be using it again! Basically, milk paint is a non-toxic paint which contains no additives or distillates that can cause any harm to people, pets or the environment. It’s made from iron oxide pigment, milk casein and lime and the finish is lovely.
This was my first time using milk paints before but I much prefer it to working with chalk paints as it seems so much easier to get a smooth finish. These days, acrylic paint as a little acrylic in them which means that they level themselves if you leave them to dry completely before going over again with the next coat which is what makes the smooth finish easier to achieve.
I also like using milk paints because they seem to last forever! At the class I was at, I wanted to use a beautiful Persian blue for the legs of my table but there was only a little bit left at the bottom of the tin so I initially put it back but the lady told me that the teeny bit would easily do what I wanted and she was right – there was even enough for someone else to do a big drawer front too! It seems to stretch so well, possibly because you use a sponge applicator rather than a brush to put it on?
You can generally paint milk paint directly onto any surface but if you’re painting onto a finished surface and want a perfectly smooth non-distressed look then you’re going to want to sand and prime your surface first.
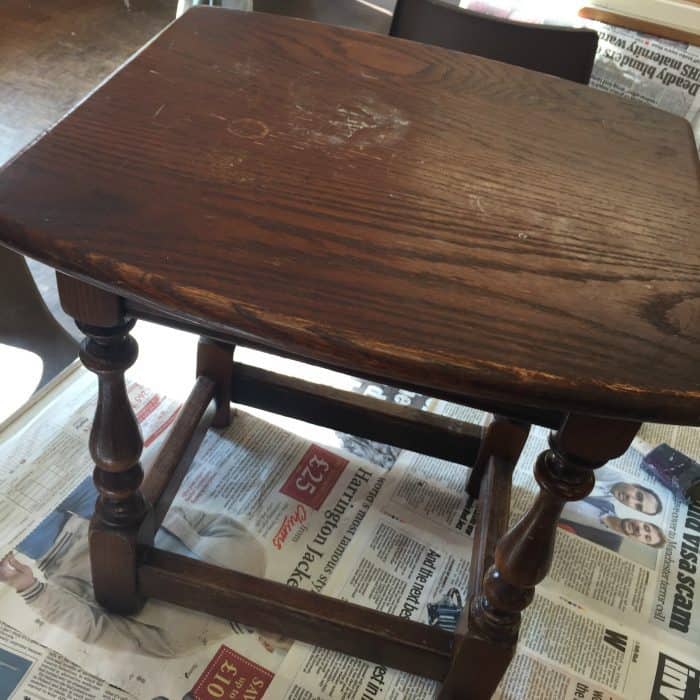
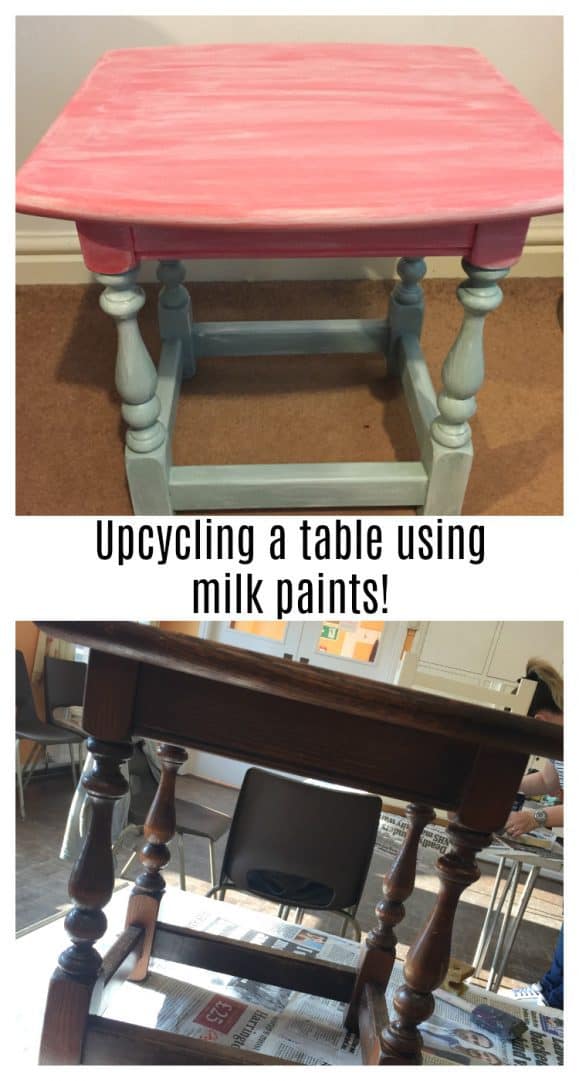
I chose to decorate this little table which I rescued from my Dad’s flat when we were clearing it out for him:
I decided to go for slightly brighter than usual colours which won’t really fit anywhere in the house because I wanted this to go in my new office in the garden which I’ll tell you more about at some point when my plans are a bit firmer but basically, I need an office space but every spare space in the house is spoken for – the garage was the last space I had my eye on but that’s been turned into a mini gym thanks to some bargain eBay and Facebook gym equipment buys! We ruled out a conservatory because of the cost of it so we decided to look into a Summerhouse or log cabin for the garden which turned out to be much less expensive than you would expect. I’m not sure Autumn or Winter is the best time to get it installed so we’re going to wait until Spring unless we come across a great deal but in the meantime, I thought this little table would be a great first piece of furniture!
Anyway, back to the table.
I was painting directly onto the varnished mahogany finish in the table so I’ll take you through what I did step by step in case you have a project you want to do using milk paints:
- First of all, I gave the table a good wipe down and made sure it was clean.
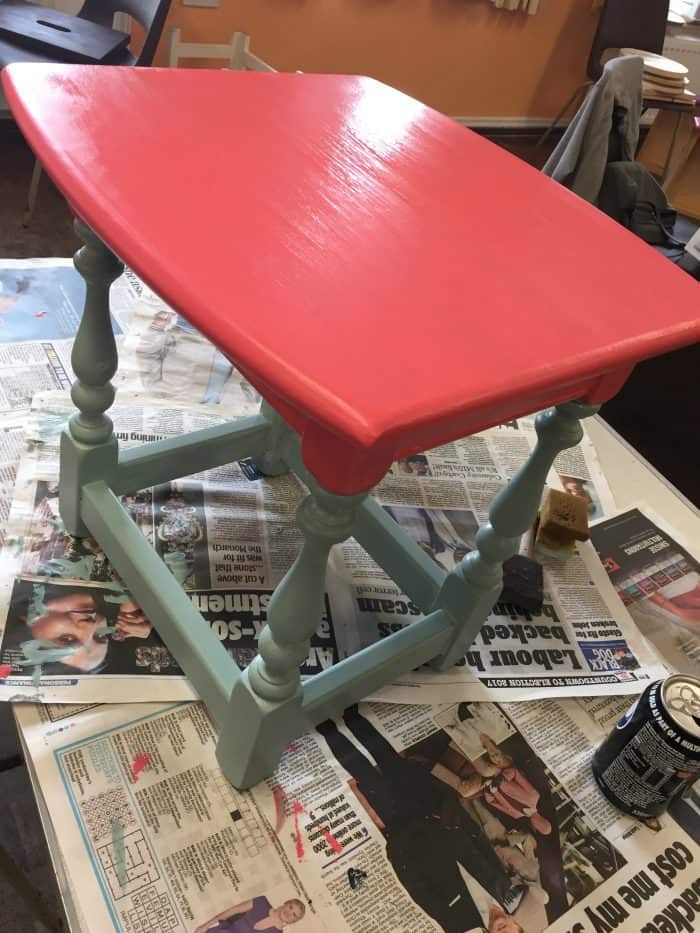
- Next, I chose the colours I wanted so as you can see, I went coral pink on top and Persian blue on the legs. I started on my first coat with the pink on the top and literally swiped on the pain using the sponge applicator in the direction of the grain in the wood. I went from one side to the other and once it was done (albeit very patchy for this first coat) I went over the whole strip with the applicator in one long swipe. This takes off any excess paint and smooths the surface. Do not go back over this bit again until it’s dry or you’ll end up with drag marks or brush strokes in the paint. I carried on doing this until the top of the table was covered with pink paint.
- While the pink paint dried, I did the same on the rest of the table using the Persian blue – easier said that done with intricate legs but eventually, I had given the rest of the table a light coat.
- Moving back to the pink, which was now dry, I gave that area of the table a second coat which made it look so much better as it was much less patchy after this coat.
- I then went back over the Persian blue again.
- And then back to the pink to ensure that it was a solid block of colour and not patchy at all.
- Then back to the Persian blue where again, I gave it a third and final coat to make sure there were no patchy bits and everywhere had an even coverage.
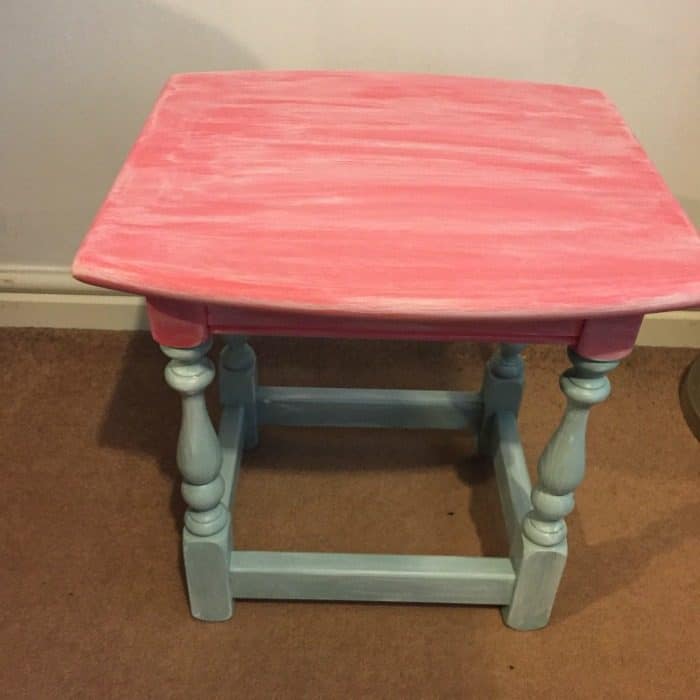
- Finally, when all of the paint was completely dry, I added a layer of white glaze to give it a bit of an aged effect. It was a very light layer that I added using an applicator with barely any of the glaze on it and wiped over gently with a wet paper towel to take most of the glaze off.
Don’t miss out on future posts like this – receive updates directly to your inbox by email by adding your email address here and hitting subscribe. You can also follow me on Twitter, BlogLovin or Networked Blogs and I’d love to see you over on my Facebook page and on Instagram


 Logging you in...
 Loading IntenseDebate Comments...


linda · 388 weeks ago
Cassandra · 388 weeks ago